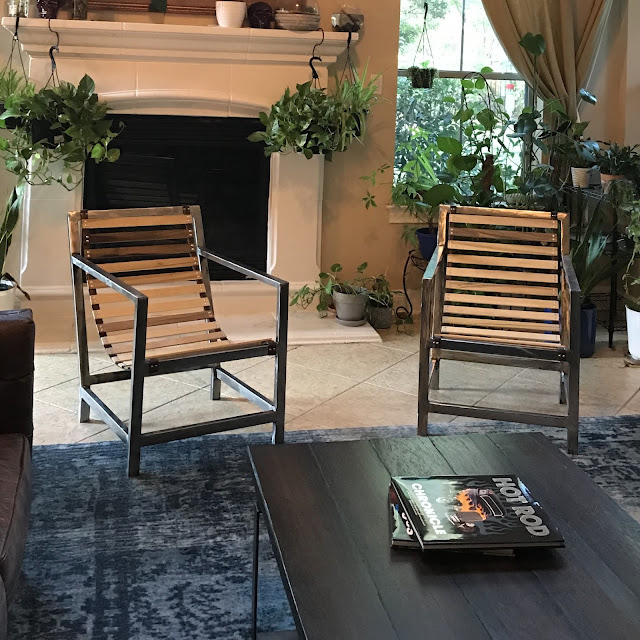
So now that we're all stuck at home for a little bit, I'd wanted to start taking advantage of my front porch a lot more so that I could sit and read, sip cool beverages and wave from an acceptable social distance to my neighbors that are now spending a lot more time walking or being out in their yards. I wanted a pair of cool chairs, but with most stores being shut down and the financial outlook being uncertain for a while, I didn't want to buy something expensive online, so I started scouring the interwebs for things that I could make myself and not break the bank.
My woodworking skills and tools are basically non-existent, but I dabble with welding and I love the look of steel furniture, so that's where my search began. After going down some deep Pinterest rabbit holes, I discovered this awesome old blog post from @pneumaticaddict about her wood and leather sling chair. (She has a ton of really cool DIY content! Go check her out!!)
I fell in love with the overall design of the chair and wanted to give it a go, but decided to make them out of 1.0" x 1.5" x 0.065" steel rectangular tubing and not wood so that I could dust off the welder and my very rusty welding skills. Her dimensions were a great start, but I needed to make a few tweaks to account for mitered corners in certain spots and slight difference in material thickness. Also, I lowered the bottom bars a touch for aesthetic reasons since my rear upright bars are curved at the bottom, not angled. Here's my cut list:
- 3 x 20" pieces for the front and real lower cross bars
- 1 x 23" piece with corners cut at 45 degrees for top cross bar
- 2 x 33" pieces for rear uprights with 45 degree cuts on top to match cross bar, 30 degree bend 4" from bottom.
- 2 x 24" pieces for front uprights with 45 degree cuts facing rearward at top where it meets arm rest
- 2 x 21" pieces with a slight curve notched into one end to match rear bar (cut a little long and trim to fit.)
- 2 x 30" pieces for arm rests. 45 degree cut in front to match uprights and 30 degree cut on the back to align with the rear upright (cut a little long and trim to fit.)
Notes:
- Plan ahead so that tubing seams face downward or to the back of the chair.
- Build rear legs at the same time to make sure they have the exact same curve and length
- Build front of chair and then back of chair as assemblies and then custom fit the arm rests and rear lower bars to your chair since the angles might vary slightly from mine and could impact length of the tubes
- Remove mill scale before assembly as you cannot reach some of the corners with an angle grinder once assembled.
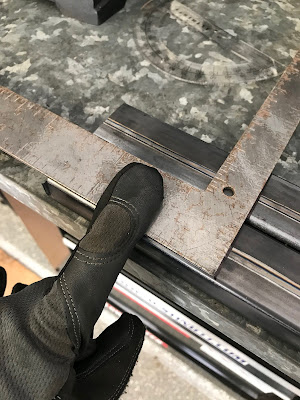
I started with the rear. I cut the uprights to 33" and then marked each one at 4", 4.5" and 5" and made cuts there with my 14" abrasive chop saw, only cutting one face and the two sides, leaving one side of the tube intact. This let me simply bend the tube, then I could weld it back up with the exact 30 degree radiused bend I was looking for. This worked out great, but if you're making the cuts with something other than an abrasive chop saw, you may need more or fewer cuts to achieve the correct bend. (I was making two chairs at once, that's why you may see more parts than needed for one in some pics.) Then, I cut the tops at 45 degree angles to match the top piece and then squared it up and welded it with one of the 20" cross bars placed 5" from the bottom (basically as low as I could get it once the curve had straightened out.)
Prior to building the front assembly, I wanted to fit the rear lower bars. I stood the rear frame upright on its side, positioned the rear tube where I wanted it in relative vertical position, marked it and then I traced the curve of the rear tube onto a piece of stiff paper (yes, that is a Magic the Gathering card :p) cut out the shape and used that to mark where I was going to trim all of the tube ends so that they were all identical. Worked great!
Next, I made the front piece by welding two 20" cross bars into the 24" uprights. I made the lower bars 3-3/4" off the ground because going 4" as speced in the original plan just looked a little "funny" with my rear curve. The upper of the two bars is positioned so that the top of it is 15" off of the ground.
Once I had the two assemblies, I loosely tacked in the lower rear bars.
I cut the arm rest bars to 30-3/8" as specified in the @pneumaticaddict's plans, but they were a bit long as my dimensions ended up being slightly different since I handled the rear bend differently. I mitered the front end of the arm rest tubes to 45 degrees and then held them up with a level on rested on top and used a marker to trace the exact rear angle cut. I did that by making teeny cuts on the grinder and checking fit each time. Took a while, but ended up with a great fit. Once cut to size, I put a single tack weld on the front and rear of the arm rest to hold it in place.
Then, using a couple of ratchet straps and a square, made sure it was all level and square before welding it together. I sort of went around from joint to joint adding a tack or two and then moving on to not build up heat and end up pulling it out of level/square. Once it was pretty solid, I welded all of the seams and then ground the welds flush with a flapper disk.
I finished the chairs by grinding off all of the mill scale, wiping them down three times each with mineral spirits and then spraying them with several light coats of glossy clear enamel. I ground one down with an 80 grit flapper wheel on my angle grinder. It took a while and really took a bite out of the chair, leaving quite a noticeable pattern and texture. The other chair I cleaned off with one of the "paint remover" abrasive stripper disks. (It actually took 2 disks to finish!) It was much faster and didn't leave the scratches and seemed to "polish" it more. To be honest, I think I prefer the flapper disk finish, and it really didn't seem to consume much of the disk. That's it for the frame part of the chair.
For the straps and slats, I followed @pneumaticaddict's instructions. I used 1/8" x 5/8" inch aluminum rivets like she had, but found some "big head" or "large flange" ones so that I wouldn't have to have a washer on the front and used a 1/8 x .375 x .048 washer on the rear. Rather than attach the belts to the chair with carriage bolts, I used M5-.8 x 40mm button head socket cap stainless screws with lock nuts on the back. I made the first chair with 17 slats as she had, but found it a little too low/droopy, so I took one out to have 16 and it seems much better for the dimensions of my chairs. In the pic below, the rear chair has 16, the front has 17. I've since removed one and shortened the straps so they are both at 16. I decided to lightly sand the .25" x 1.5" x 19" poplar slats to prevent splinters and gave them a couple of coats of boiled linseed oil (BLO) to help protect the wood a bit. (NOTE: be sure to follow all safety instructions on using BLO and clean and dispose of your rags appropriately!)
That's it! Overall, I'm super happy with them. As far as cost, ordering steel online and shipping it isn't cheap and I did use a lot of consumables. If you factor in hardware, paint, etc., it's probably about $200-$250 in materials per chair. Compared to what they would cost to purchase, that's super cheap though. They were also really labor intensive and ended up being a lot more work than expected. Most of that can be chalked up to trying to get the cuts accurate and me blowing lots of holes in the thin-walled tubing with my welder and having to fill them and grind them back down, etc. 2nd chair was much faster than the first as my cuts and welds were much improved. They are super comfy and I like them so much that I'm a little afraid to leave them out on my front porch now! :p If I were to do it again, I think I'd invest in a better saw. The abrasive disk chop saw would wander a lot on any cut not 90 degrees and I just suck using an angle grinder with a cutoff wheel :p. Also, I'd spend a little more money for higher quality belts to use as straps. The ones I got were "leather", but that meant that they were two super thin strips of leather (like paper thin) sandwiched around some mystery fibers. The seem plenty strong now, but I'm a bit worried about their longevity.


No comments:
Post a Comment