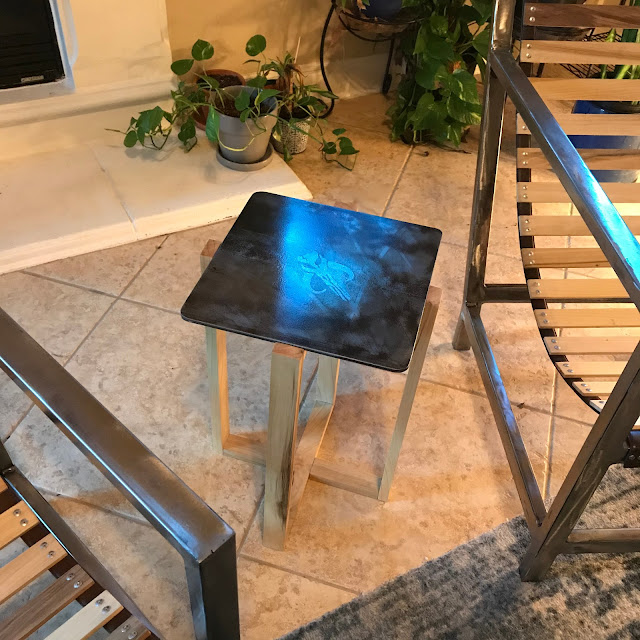
Her plans are very simple and easy to follow, so I won't repeat them too much here, but what I did do is shorten it by 4" on all 3 axis (12" x 12" x 20" vs. 16" x 16" x 24") to better suit my space. I'd wanted to continue the steel and poplar wood theme of my chairs, so I decided to go with poplar legs and a steel top. I found a pre-cut 12" x 12" x .025" steel plate at the home improvement store that made my life a lot easier. (Since the steel plate is 1/4" thick, not 3/4" as her top was, place the upper cross 1/4 inches below the top, not 3/4.)
I cut the wood pieces on the miter saw. The cut list is as follows:
- 4 x 20"
- 2 x 12"
- 4 x 5.25"
Next, I cut pocket screw holes into all of the shorter pieces.
After that, you just screw the pieces together. I found that if I used the recommended 1.25" pocket hole screws, it would start to punch out in the back, so I dropped down to 1". (I could have raised the height of the stop on the drill bit so they wouldn't punch so deeply, but I had already pre-cut all of them when I noticed that.) I assembled mine in a slightly different order and it seemed to work out just fine. (I built a rectangle out of two sides and the two longer "cross" pieced, then held it in place with a large weight and was able to get at it pretty well to screw in the pocket hole screws.)
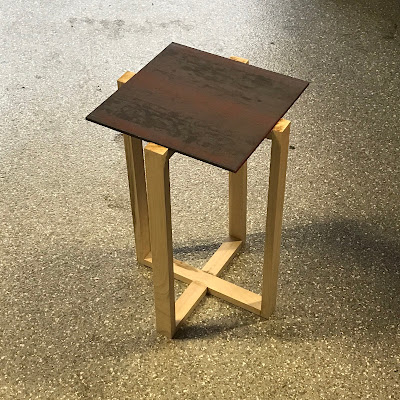
Here's the finished base with the plate resting on top:
I was torn about how I wanted to finish the top. The chairs were ground almost to a polish and then clear coated with several light coats of spray enamel. Now that I've spent a fair bit of time in those chairs, some of my favorite details are the little imperfections where I missed removing some mill scale or there's a discoloration due to the heat from welding, etc. so I decided that I wanted to have the surface of the plate be pretty heavily darkened from the get go. I had heard of a process to darken steel and quickly establishing a patina by applying acids (vinegar) to the surface, so I figured I'd give that a go.
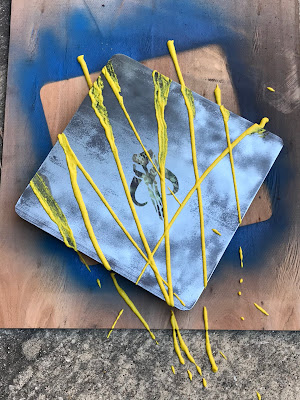
I started by radiusing the corners and edges of the plate with a grinder do avoid pokes or cuts. Then I used a paint-removing flapper on my 4.5" angle grinder to remove the mill scale on the top surface of the plate. I wiped the entire thing down several times with mineral spirits to prep it for paint. I had some old spray paint left over from another project, so I used that to paint the "bottom" side of the plate to keep it from rusting. I wanted a lot of variation in color and to have some interesting details on the surface, so I applied a decal I had laying around to the center of the plate to effectively mask off that area and keep it polished.
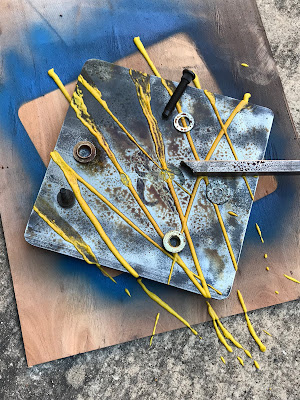
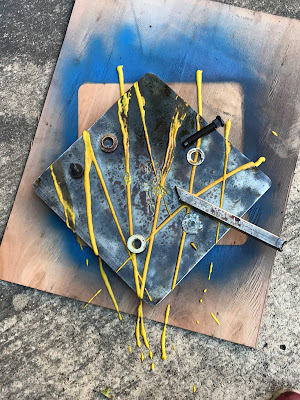
Next, I took good old yellow mustard (contains vinegar) and laid out a few stripes on the plate and then widened some of them our with a paint brush.
Once that had been sitting for 8 minutes or so, I placed several random shapes on the surface of the steel and proceeded to spray the entire thing down with vinegar. (I happened to already have balsamic vinegar in s spray bottle for salads, so I gave that a try vs. the more commonly used white or apple cider vinegars.)
Then, after about another 10 minutes, when the plate had darkened considerably, I wiped off all of the vinegar and mustard with damp rags to stop the reaction. Here's the newly etched plate with the sticker removed:
I added about 4-5 light coats of clear spray enamel and here is the finished result:
I'm really happy about how it turned out! I might stain the base a slightly darker shade (currently just has a Boiled Linseed Oil (BLO) finish) but that would be about it. I already had the paint, screws, etc, so this project only cost me about $20 in materials!







No comments:
Post a Comment